How to Clean Move-Out Cleaning Like a Pro Fast and Easy
Move-out cleaning does not have to be stressful or slow. This guide shows you how to clean move-out cleaning the smart way, with simple steps, room-by-room tips, and fast methods that help you leave your space spotless and ready for inspection.
How to Clean Move-Out Cleaning Like a Pro Fast and Easy
Move-out cleaning can feel big. You may be packing boxes, changing addresses, and trying to meet a deadline all at once. The good news is that move-out cleaning does not need to be hard. With the right plan, you can clean fast, stay calm, and leave the place in great shape.
In this guide, you will learn how to clean move-out cleaning step by step. You will see what to clean first, which rooms need the most care, and how to save time without missing the details. You will also get simple tips for tough spots, a few common mistakes to avoid, and a final checklist to help you finish strong.
If you want a smooth move and a clean handoff, this guide is for you. It is built for real life, with simple steps and easy language. Let’s make move-out cleaning feel much less stressful.
Key Takeaways
- Start with a plan: A clear checklist saves time and helps you avoid missed spots during move-out cleaning.
- Clean from top to bottom: Dust and dirt fall downward, so this method makes move-out cleaning faster and easier.
- Focus on high-touch areas: Doors, switches, handles, and counters matter most during move-out cleaning.
- Use the right supplies: Simple tools like microfiber cloths, a vacuum, and an all-purpose cleaner can handle most jobs.
- Work room by room: Breaking move-out cleaning into sections keeps the process organized and less overwhelming.
- Check the details: Baseboards, appliances, and inside cabinets are easy to forget but often matter most.
- Do a final walkthrough: A last inspection helps catch anything you missed before you hand over the keys.
What Move-Out Cleaning Means
Move-out cleaning is a deep clean done before you leave a home, apartment, or rental space. The goal is to leave the place clean for the next person and to help you meet lease rules or landlord expectations. A good move-out cleaning often covers more than a normal weekly clean.
It usually includes floors, walls, counters, cabinets, appliances, bathrooms, and hidden spots that collect dust and grime. In many cases, move-out cleaning also means cleaning inside drawers, behind appliances, and along baseboards. The more complete the clean, the better the result.
If you are moving with children, it can help to keep the process safe and organized. For example, if you have little ones around while you pack, you may also want to check out non slip socks for babies learning to walk so they can stay steady while the home is busy and full of boxes.
Gather Your Supplies First
Before you start move-out cleaning, collect everything you need. This saves time and keeps you from stopping every few minutes. A small cleaning kit can make the whole job easier.
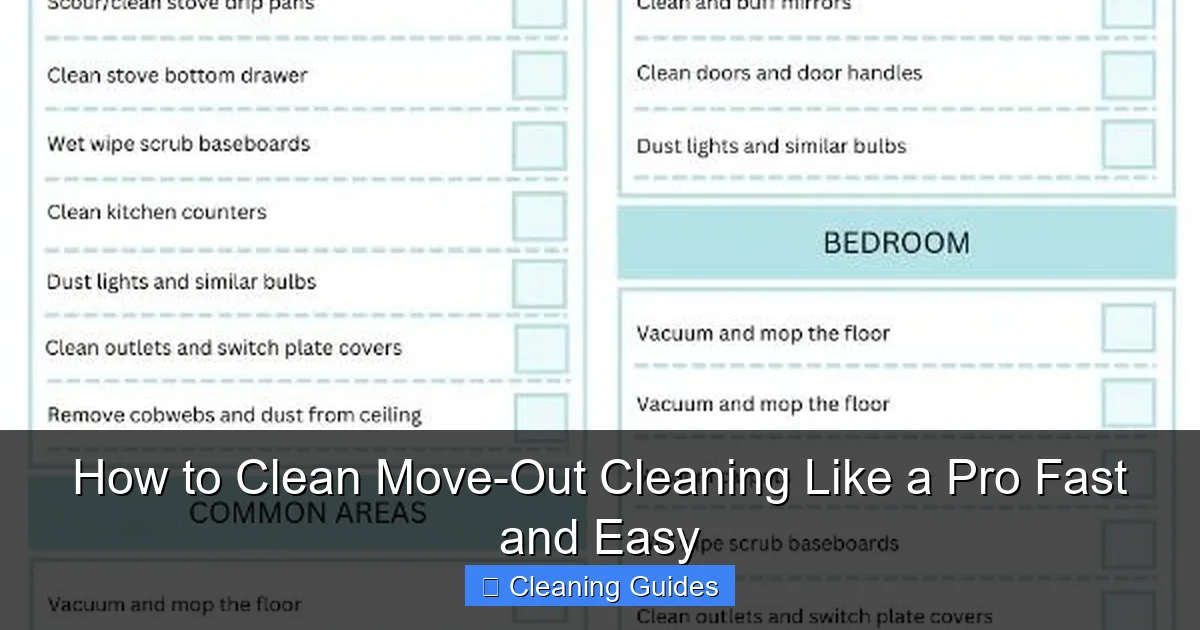
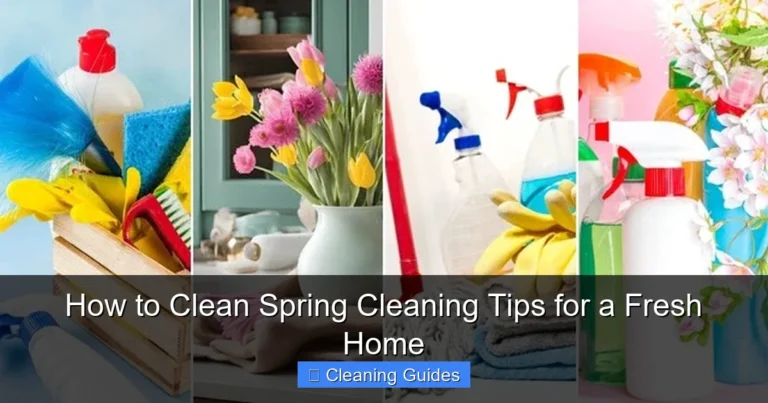
Visual guide about How to Clean Move-Out Cleaning Like a Pro Fast and Easy
Image source: i.pinimg.com
Basic supplies to have on hand
- Microfiber cloths
- All-purpose cleaner
- Glass cleaner
- Disinfecting wipes
- Sponges
- Scrub brush
- Broom and dustpan
- Vacuum
- Mop
- Trash bags
- Rubber gloves
- Baking soda and vinegar for light buildup
Keep your supplies in one bucket or tote. That way, you can move from room to room without wasting time. If you are short on time, focus on tools that clean many surfaces at once. A microfiber cloth and all-purpose cleaner can do a lot of work during move-out cleaning.
Make a Move-Out Cleaning Plan
The fastest way to clean is to have a plan. Move-out cleaning gets easier when you break it into steps. Start with the rooms that are most used or most dirty. Then move to the smaller spaces.
Use this order
- Declutter and remove trash
- Dust from top to bottom
- Clean walls, windows, and fixtures
- Wipe cabinets, counters, and shelves
- Clean appliances and sinks
- Scrub bathrooms
- Vacuum and mop floors
- Do a final walkthrough
This order works because dirt falls down as you clean. If you mop first and dust later, you will just have to clean the floor again. Top-to-bottom cleaning is one of the best move-out cleaning tricks for saving time.
Step 1: Remove Trash and Unwanted Items
Start by clearing the space. Pick up trash, broken items, old papers, and anything you do not want to move. Empty every room, closet, cabinet, and drawer as much as possible. A clean room is much easier to clean well.
How to do it fast
- Use one bag for trash
- Use one box for items to donate
- Use one box for things you still need
As you clear each room, check under beds, behind doors, and inside cabinets. These spots are easy to forget during move-out cleaning. The less clutter you have, the faster the rest of the job will go.
Step 2: Dust Everything From Top to Bottom
Dust is one of the biggest problems in move-out cleaning. It builds up on shelves, light fixtures, ceiling fans, vents, and baseboards. Start high and work your way down so dust does not land on already cleaned surfaces.
What to dust
- Ceiling fans
- Light fixtures
- Window sills
- Top of cabinets
- Shelves
- Door frames
- Baseboards
- Air vents
Use a dry microfiber cloth for light dust. For sticky spots, use a damp cloth with a small amount of cleaner. If a room has not been cleaned in a while, you may need a second pass. That is normal in move-out cleaning.
Step 3: Clean the Kitchen Carefully
The kitchen usually takes the most time. It has grease, crumbs, spills, and food residue. In move-out cleaning, the kitchen often gets extra attention because it is one of the first places a landlord or buyer will inspect.
Clean the appliances
Start with the fridge, oven, stove, microwave, and dishwasher. Remove shelves and drawers if you can. Wipe inside and outside surfaces with a cleaner that matches the material. For baked-on grease, let the cleaner sit for a few minutes before scrubbing.
Clean cabinets and drawers
Empty every cabinet and drawer. Wipe the inside, outside, handles, and edges. Check corners for crumbs and sticky spots. If shelves are dusty or stained, use a damp cloth and dry them right away.
Clean counters and sinks
Wipe counters with an all-purpose cleaner. Scrub the sink, faucet, and drain area. If the sink has stains, baking soda can help lift them. Finish by drying the surfaces so they look fresh and clean.
If your move-out cleaning happens while family life is still active in the home, a good night’s rest can help you keep your energy up. You may find 10 proven tips to boost your sleep quality tonight useful when you need to recharge before a big cleaning day.
Step 4: Deep Clean the Bathrooms
Bathrooms need a full clean during move-out cleaning. They can show soap scum, water stains, and grime very quickly. Focus on toilets, tubs, showers, sinks, mirrors, and floors.
Bathroom cleaning order
- Spray shower and tub surfaces first
- Let the cleaner sit while you clean other areas
- Scrub the toilet inside and out
- Wipe the sink and counter
- Clean mirrors and fixtures
- Finish with the floor
For soap scum, use a scrub brush or sponge. For hard water spots, a vinegar-based cleaner may help. Make sure to rinse and dry surfaces well. A dry bathroom looks cleaner and helps prevent streaks.
Step 5: Clean Bedrooms, Living Rooms, and Hallways
These rooms may not be as greasy as the kitchen, but they still need careful move-out cleaning. Dust, fingerprints, wall marks, and floor dirt are common here. Clean each room one at a time so you do not miss anything.
What to clean in each room
- Dust shelves and furniture
- Wipe light switches and handles
- Clean windows and mirrors
- Vacuum carpets and rugs
- Dust or wipe baseboards
- Check corners and edges
If you see scuff marks on walls, try a damp cloth first. For tougher marks, a gentle cleaner or magic eraser may help. Always test a small area first. In move-out cleaning, it is better to use a light touch than to damage paint.
Step 6: Clean Closets, Shelves, and Storage Areas
Closets and storage spaces are easy to skip, but they matter in move-out cleaning. Empty them fully and wipe down the walls, shelves, and floors. Dust often hides in these small spaces.
Simple closet checklist
- Remove all items
- Wipe shelves
- Dust corners
- Vacuum the floor
- Check for nails, hooks, or damage
If you used shelves for baby items, clothes, or toys, this is a good time to sort and pack. If you are also organizing things for a child, you may want to read shoes for baby learning to walk for helpful ideas while you prepare for the move.
Step 7: Wash Windows, Glass, and Mirrors
Clean glass makes a home look brighter and more cared for. During move-out cleaning, wipe windows, mirrors, and glass doors. Use glass cleaner and a lint-free cloth for the best finish.
Tips for streak-free glass
- Clean on a cool day if possible
- Use a dry cloth to finish
- Wipe in one direction
- Do not use too much spray
Do not forget window tracks and sills. These areas collect dust, dead bugs, and dirt. A small brush or vacuum attachment can help get into the corners.
Step 8: Vacuum and Mop the Floors
Floors are one of the last things you should clean during move-out cleaning. By this point, most dust and debris should already be gone. That makes floor cleaning faster and more effective.
For carpet
Vacuum slowly and in overlapping lines. Go over edges, corners, and under furniture if possible. If there are stains, treat them before vacuuming again.
For hard floors
Sweep or vacuum first. Then mop with a cleaner made for your floor type. Use less water on wood floors and more careful pressure on tile or laminate. Make sure the floor dries fully before you leave.
Clean floors are often the final sign of good move-out cleaning. They make the whole place feel fresh and complete.
Step 9: Handle Walls, Doors, and Trim
Walls, doors, and trim show fingerprints, marks, and dust. They are easy to ignore, but they matter a lot in move-out cleaning. A quick wipe can make the space look much better.
What to check
- Fingerprints around switches and handles
- Smudges near door frames
- Dust on trim and molding
- Scuffs near corners
Use a soft cloth with a mild cleaner. Do not soak the wall. If you find holes or damage, note them for repair. Move-out cleaning is not only about dirt. It is also about leaving the place neat and ready for the next person.
Step 10: Do a Final Walkthrough
The final walkthrough is one of the most important parts of move-out cleaning. It helps you catch small things before you hand over the keys. Walk through each room slowly and look at the space as if you were seeing it for the first time.
Final walkthrough checklist
- Check all lights and switches
- Look inside cabinets and drawers
- Inspect floors for dust or hair
- Check mirrors and glass for streaks
- Make sure trash is removed
- Look behind doors and appliances
- Confirm all personal items are gone
If you have time, take photos after cleaning. Pictures can help if there is any question later about the condition of the home. This is a smart habit for move-out cleaning, especially in rentals.
Fast Move-Out Cleaning Tips
If you are short on time, you can still do a strong move-out cleaning. The key is to focus on the most visible and most important areas first. Do not try to make everything perfect. Try to make everything clean, neat, and ready.
Use these fast tips
- Work one room at a time
- Set a timer for each task
- Keep supplies close
- Use multi-purpose cleaners
- Clean while the room is empty
- Ask for help if you can
Another smart move is to clean as you pack. Wipe shelves before boxing items. Sweep after furniture is moved out. This saves time and keeps move-out cleaning from piling up at the end.
Troubleshooting Common Move-Out Cleaning Problems
Even with a good plan, some problems can come up during move-out cleaning. The good news is that most of them have simple fixes.
Sticky grease in the kitchen
Let the cleaner sit for a few minutes before scrubbing. Use warm water and a soft scrub brush. Repeat if needed.
Soap scum in the bathroom
Spray the area and give it time to break down the buildup. Scrub in circles and rinse well.
Dust keeps coming back
That usually means you cleaned in the wrong order or missed vents and high spots. Dust top surfaces first, then work down to the floor.
Wall marks will not come off
Use a damp cloth first. If needed, try a gentle cleaner. Test in a small hidden spot before using anything stronger.
You are running out of time
Focus on the kitchen, bathrooms, floors, and visible surfaces. These are the areas most likely to be noticed during move-out cleaning.
When to Hire Help
Sometimes move-out cleaning is too much to do alone. If you have a large home, a tight deadline, or a full schedule, hiring help can be worth it. A professional cleaner can handle deep grime, speed up the process, and reduce stress.
This can be especially useful if you are moving with kids, juggling work, or trying to sleep between packing days. A little support can make the whole move easier.
Conclusion
Move-out cleaning does not have to feel overwhelming. When you break it into steps, gather the right supplies, and clean from top to bottom, the job becomes much easier. Start with trash and clutter, then move through each room with a clear plan. Focus on the kitchen, bathrooms, floors, and hidden spots, since those areas matter most in move-out cleaning.
Remember to do a final walkthrough before you leave. That last check can catch small issues and help you feel confident about handing over the space. With a simple system and a steady pace, you can complete move-out cleaning fast, easy, and like a pro.
🎥 Related Video: Make move out cleaning so much easier! Especially if you need to get your bond back ✔️
📺 Kacie Stephens

- 9 Best Bassinet vs Crib Picks for 2026 – Expert Reviewed - May 24, 2026
- 10 Best Bedside Sleepers for 2026: Expert-Tested & Top Rated - May 23, 2026
- 9 Best Bedside Bassinet for Newborn in 2026 – Expert Tested - May 23, 2026